The Demo Network
I think it would be of value to my audience if you described the network environment I am building this on.
The Router
The router is a modified Cisco E2500, I got from a Local PC Recycle store for $5.00
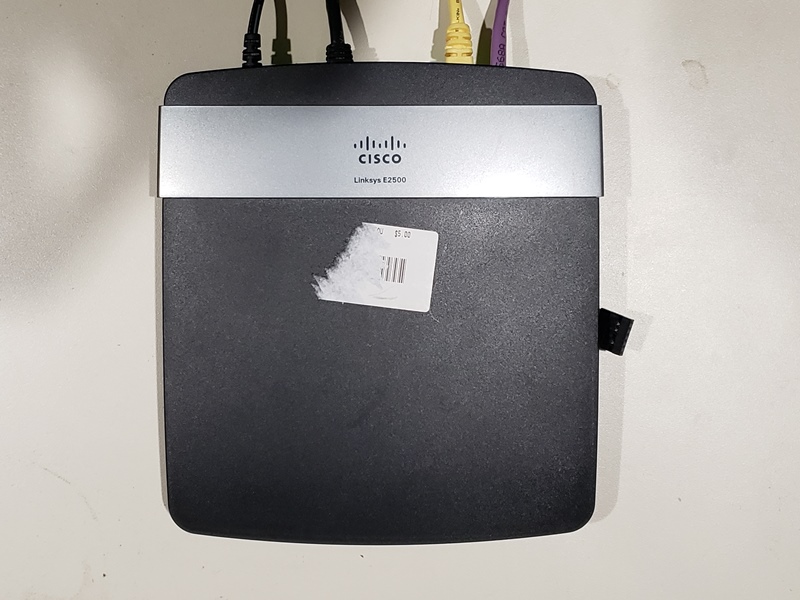
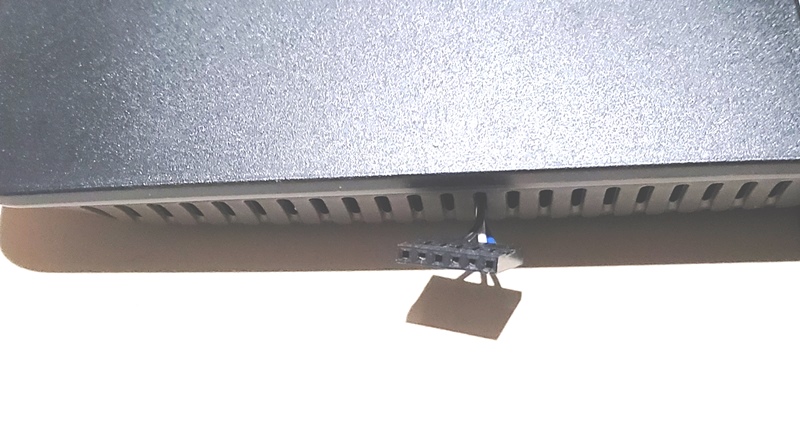
I flashed the device with a third party firmware called DDWRT, and also did a hardware modification to add a serial port. This serial port was not needed to flash or manage the router, but it is a cool example of being able to access the console in case you bricked your router.
This router does have a couple of ports forwarded internally so I can access services from another location on my internal network so I can test and manage them. The computers on the internal network NAT to the outside world, but there will be no NAT to the outside world for this device. I am treating it like although this machine can freely access the Internet, it has little control on the incoming connections.
So I will not be opening up 22, 25, 80, 443, or other ports to allow real world access via port forwarding, there another thing we are going to do.
One bummer thing is that the ethernet ports are only 10/100 not Gigabit. This unfortunate because the server has Gig ethernet.
The Server
The server is another thing I purchased from the local PC recycle store, it is not some huge server drawing more than 100watts, it is a thin client repurposed as a server, it is was a small thin client I purchased for $50.00
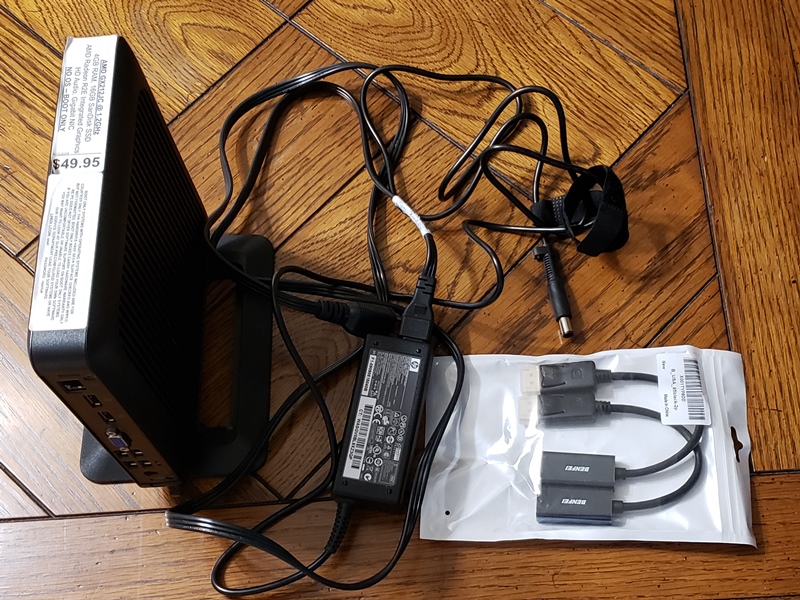
You were expecting a raspberry pi? I did a comparison on another blog I manage.
I like these X86 based thin clients because I can test things on my Virtualized Server then re implement those changes on the physical box. Also if I wanted to go bigger and faster, I have an option to move it there as well.
Finally, if you want to follow along, you dont need to buy new hardware at all, you can simply spin up a Virtual Machine on your desktop to try things out yourself.
Here are the specs of our server
This “server” had a prior life as a thin client, The model is an HP T520 thin client
- CPU Dual Core AMD GX-212JC SOC with Radeon(TM) R2E Graphics, its passmark is a wimpy 562.
- 4GB of DDR3 RAM, single stick.
- It came with an 16GB M.2 SATA 2242 storage, I purchased an upgrade to 120GB for about $25
- In the picture above there is a DP to HDMI adapter, that is not needed for this, I could have used a simple VGA cable which I had tons lying around. In the end it does not matter because this will eventually run headless in some quiet corner of my home.
- It can boot from using UEFI or BIOS
- The back has four USB2 ports and the front has two USB 3 ports. Which is good because CentOS 7 has a hard time installing on USB 3 only ports, but you want the USB3 ports for speed when the OS is finally up.
As a side note there is no wifi, no bluetooth on here.
The Network
One thing that is unrealistic about this project is we are starting with a fresh (green field) environment, so I got to plan my network setup. If you have an established network (brown field), then you will need to do your own discovery or audit to implement something similar. With that said, here is how our network will look like.
IP Addresses
| IP ADDRESS | HOSTNAME | NOTES | OS | |
| 1 | 192.168.1.1 | router.hawaiifriends.local. | Default Gateway | DDWRT Linksys |
| 10 | 192.168.1.10 | server.hawaiifriends.local. | Primary Infrastructure Server | CentOS 7 |
| 11 | 192.168.1.11 | backup.hawaiifriends.local. | Secondary Infrastructure Server | CentOS 7 |
| 12-49 | 192.168.1.12-49 | Static IP Range | ||
| 50-99 | 192.168.1.50-99 | DHCP Reserved Range | ||
| 100-199 | 192.168.1.100-199 | dhcp-${0,3,d}.hawaiifriends.local. | DHCP Open Range | |
| 200-254 | 192.168.1.200-254 | IoT Devices |
Network Information
| Subnet Mask | 255.255.255.0 |
| Gateway | 192.168.1.1 |
| DNS Servers | 192.168.80.10; 192.168.80.11 |
| Domain | hawaiifriends.local |
Wireless Information
- SSID: hawaiifriends-wifi1
- Password: FakeInfoForLabUse
- Technology: 802.11n Access WPA2-PSK AES
So if you are around and see an SSID like the one above and try to log in with that password, you will not be able to , it is just for demonstration only.
User Accounts
| Username | Password | Notes |
| root | password | root user account |
| admin | changeme | normal user with admin access |
| larry | changeme | normal user account |
| john | changeme | normal user account |
| mary | changeme | normal user account |
| william | changeme | normal user account |
So here are the initial user accounts that will be created and their roles. The passwords will be changed.
Certificate/LDAP info
The following information will be used in certifcates and LDAP if needed,
| E = admin@hawaiifriends.com | |
| Common Name | CN = ca.hawaiifriends.local |
| Organization Unit | OU = Internet Services |
| Organization | O = Hawaiifriends Corp |
| City/Locale | L = Renton |
| State | S = Washington |
| Country | C = US |
| Timezone | America/Los_Angeles |
Supporting Resources
A little side note, an ESXi VM server is attached to this switch so I can spin up machines on this network quickly for testing.
Also a lot of videos will be coming from a desktop I have set aside for this network. That desktop will record what I do so I can show what actually happens. Most of my videos I will not have minor mistakes edited out. In fact I may intentionally add mistakes.
This is a start, I am sure there will be more information that I will need to come up with as things go on.
